
Last Updated on July 14, 2026 by Samantha Marceau
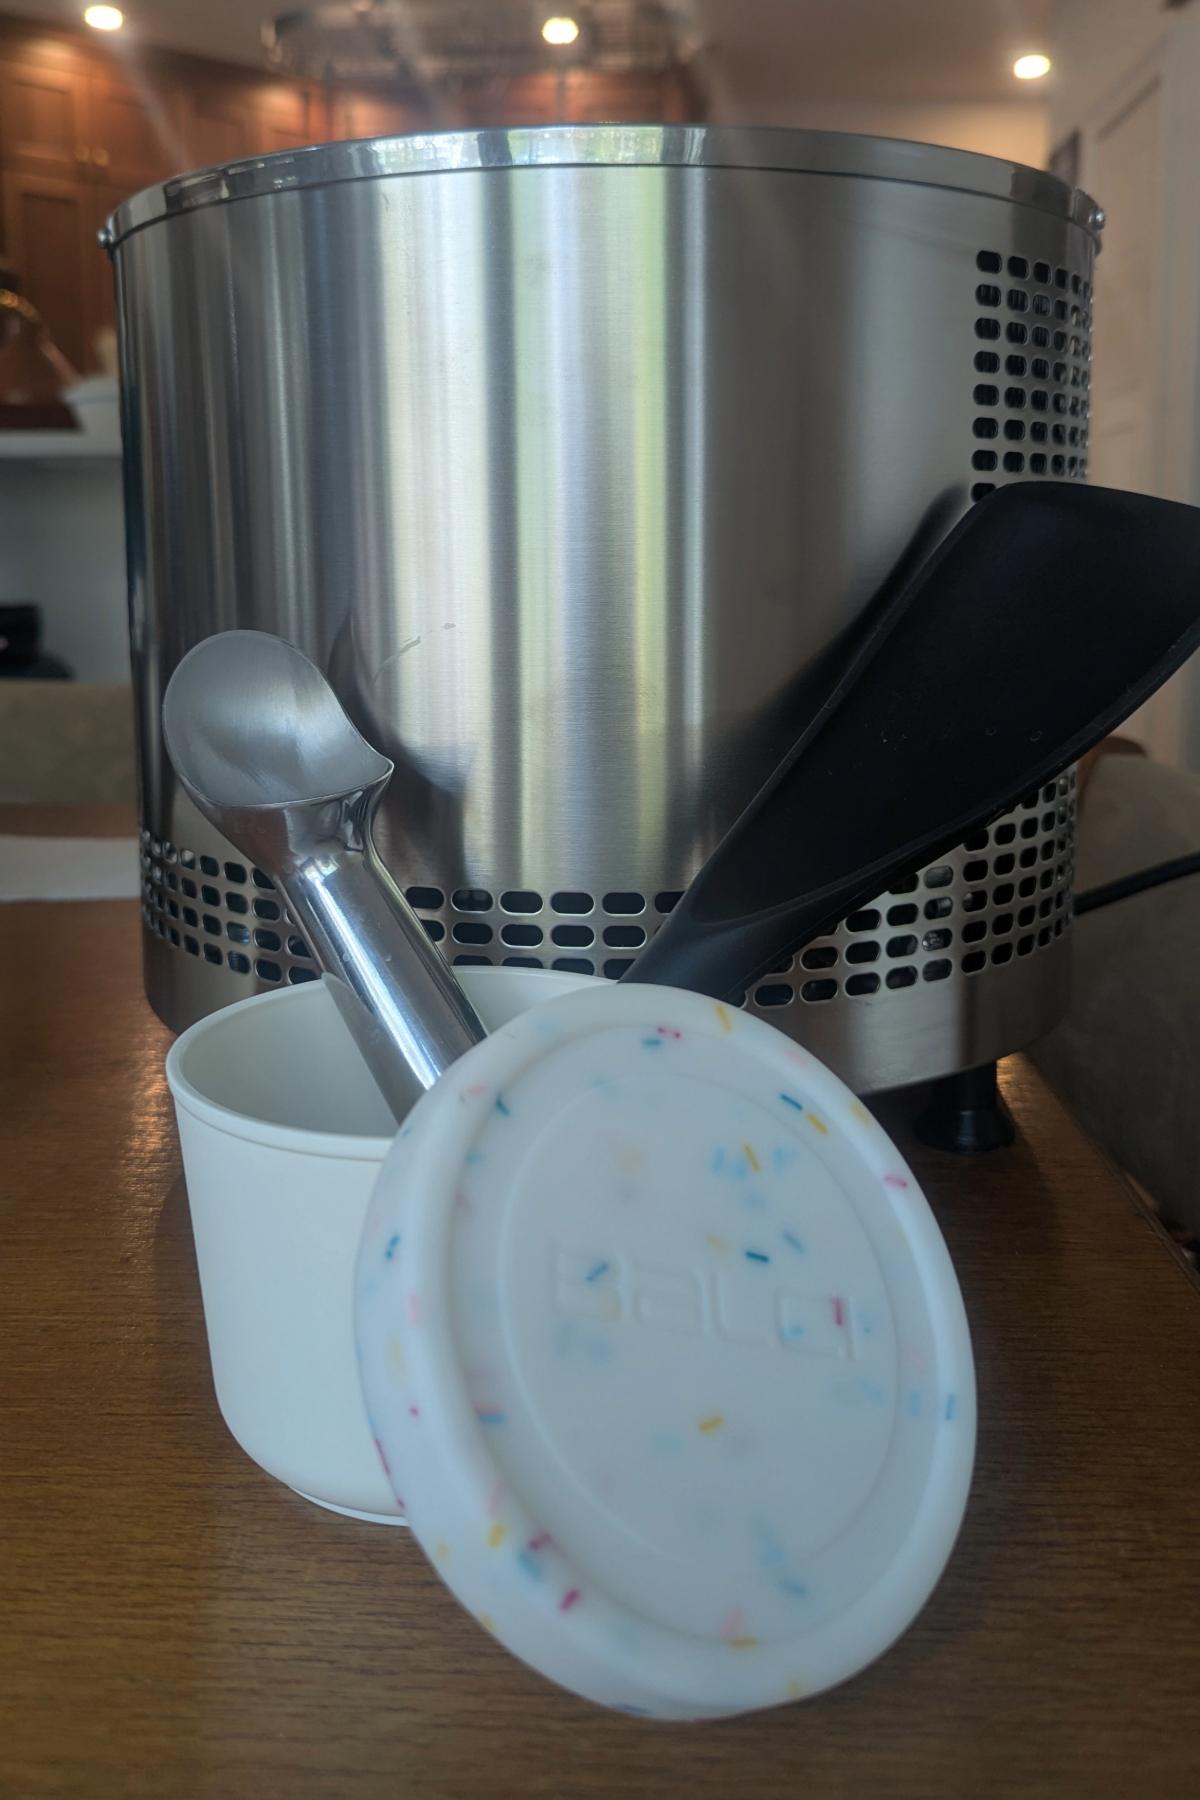
The three most useful homemade ice cream tools–beyond the machine itself–are a flexible spatula for packing pints, airtight pint containers for storage, and a quality ice cream scoop for serving. I’ve been making homemade ice cream for 7 years and these are the exact tools I use. There aren’t many accessories you truly need, but these three make a real difference in yield, texture, and presentation.
Ice Cream Making Accessories
In my experience, I’ve found that no matter if you churn ice cream with a compressor ice cream maker, a freezer-bowl, or a hand crank, what you do with the ice cream after it’s been churned is almost as important as the churn itself. To get the maximum yield, you need a spatula that gets into every nook and cranny, airtight containers to prevent freezer burn, and a great ice cream scooper for an Instagrammable bowl every time. Below you’ll find my method for testing each of these tools to find the very best ones.
Best Ice Cream Spatula for Packing Pints
In my mind, an ice cream spatula needs to do two things: remove every last bit of ice cream from the bowl and work well for packing pints. That’s a difficult ask in a home kitchen setting.
My Whynter ice cream maker came with a sub-par plastic spatula that was an awkward rectangular shape, and my Lello did not come with a scoop since I bought it second-hand. However, I’ve seen the scoop that comes with the Lello and, while it’s a better shape than the Whynter, it’s still a plastic piece of junk. I need something stiff but with a little bit of give to get around those rounded edges, and it’s even more important with a machine without a removable bowl.
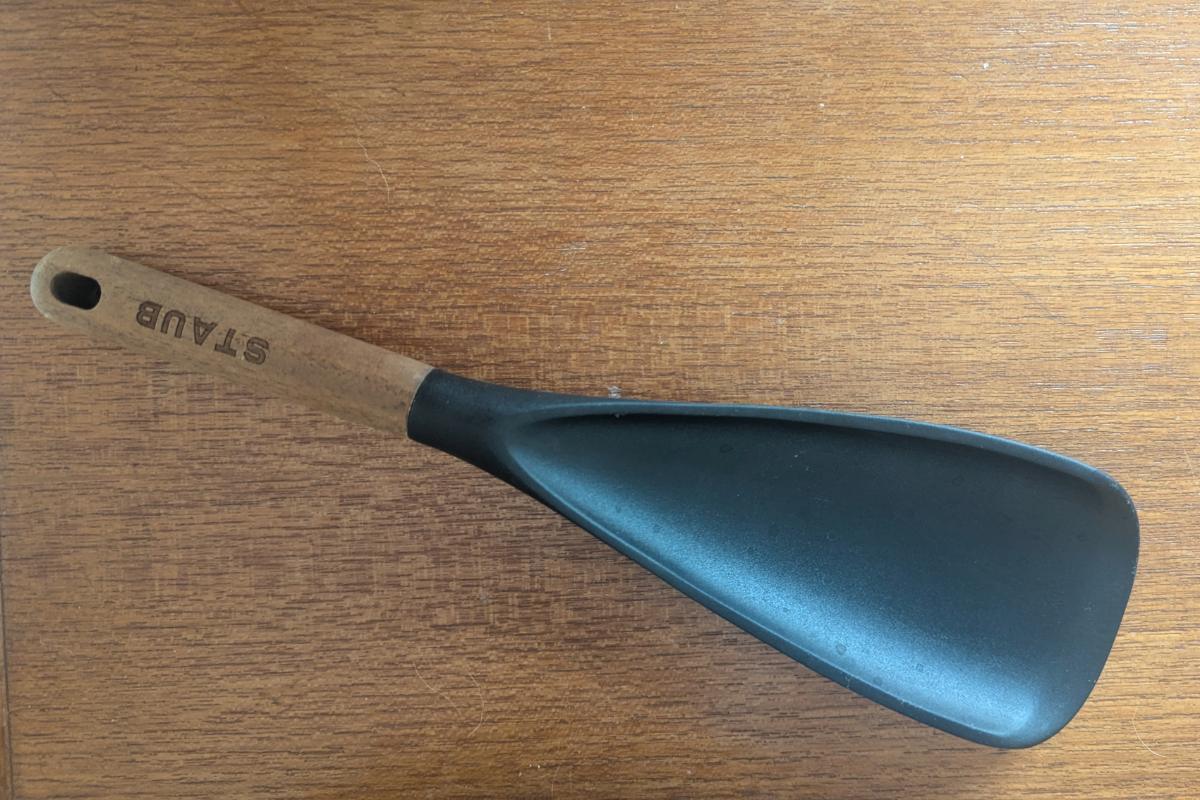
I love this Staub Multi-Function Spatula, which I bought in 2024. It’s proven to be the perfect pint packing tool! It really scrapes every last bit out of the bowl, and it’s super easy to clean with a sponge and a little soap. Yes, you can’t put the wooden handle in the dishwasher, but, like I said, it’s really easy to clean by hand with the dasher and nut that I have to clean by hand anyway (If you have a Lello, here’s my full guide on how to clean it).
Best Containers for Storing Homemade Ice Cream
I’ve spent a lot of time pondering what containers to use for homemade ice cream before I landed on my current solution. I often give away some of my ice cream to friends and family, so I like to keep a mix of reusable and disposable containers on hand. I give the reusables to close family–I know they’ll return them–and I give the disposables to everyone else.
Reusable Ice Cream Containers
When I started churning homemade ice cream, I stored it in these Tovolo 1.5-quart containers. I quickly discovered that they didn’t work well for me. Too much surface area led to earlier freezer burn, and I couldn’t easily share it with anyone outside of my own house.
I spent about 3 years searching for the perfect reusable pint containers. When I began my search, I could only find 1-quart containers and 6-ounce single-serving containers made for ice cream. Neither of those met my needs. I ended up with some vacuum-insulated 16-ounce soup containers, and those worked okay for a time, but plastic lids often got frozen shut on the stainless steel mouth.
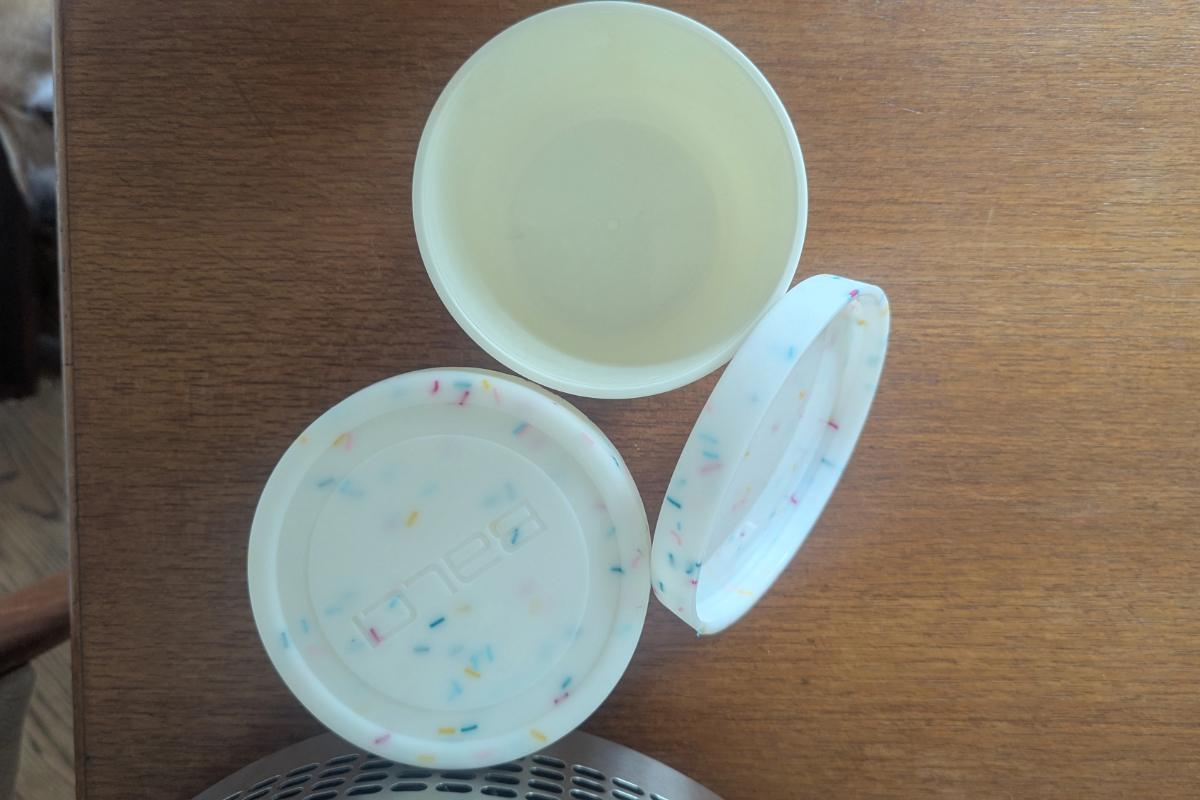
Finally, in 2024, I found these Balci brand pint containers from Amazon. They’re sturdy plastic with a flexible silicone lid, and they’re dishwasher safe on the top rack. I still like to put parchment between the ice cream and the lid to seal out any air, but I do that with the disposable pints as well. I would say these perform just as well at preserving texture, so I’m a happy camper. The downside is that they don’t fit in my ice cream chiller, but I just switch to disposable when I know I’ll be travelling with it. These are the best reusable option I’ve found, and although I don’t love that they’re plastic, I have found them to be incredibly sturdy and long-lasting.
Disposable Pint Containers for Ice Cream
From the beginning, I’ve used disposable soup or ice cream containers whenever I want to gift my homemade ice cream or bring it to a party. They’re cheap, convenient, and worry-free. I’ve been buying the same brand from Amazon since 2020, and I’ve never had any complaints. I like that I can draw on the pints with Sharpie or stick custom-printed labels on them if I’m feeling fancy (I like these Avery Round Printable Labels from Amazon because they work in any printer. They give you a template for your design, and I usually make one in Canva). This is the best and cheapest option if you love to give away your homemade creations.
The Best Ice Cream Scoop for Home Use
What to Look for in an Ice Cream Scoop
Before I get to my pick, here’s what actually matters when choosing a scoop for home use:
- Release mechanism: Spring-loaded scoops are common and cheap, but the spring is the first thing to break, and the mechanism can trap ice cream and bacteria. A spade-style or fluid-handle scoop skips the spring entirely.
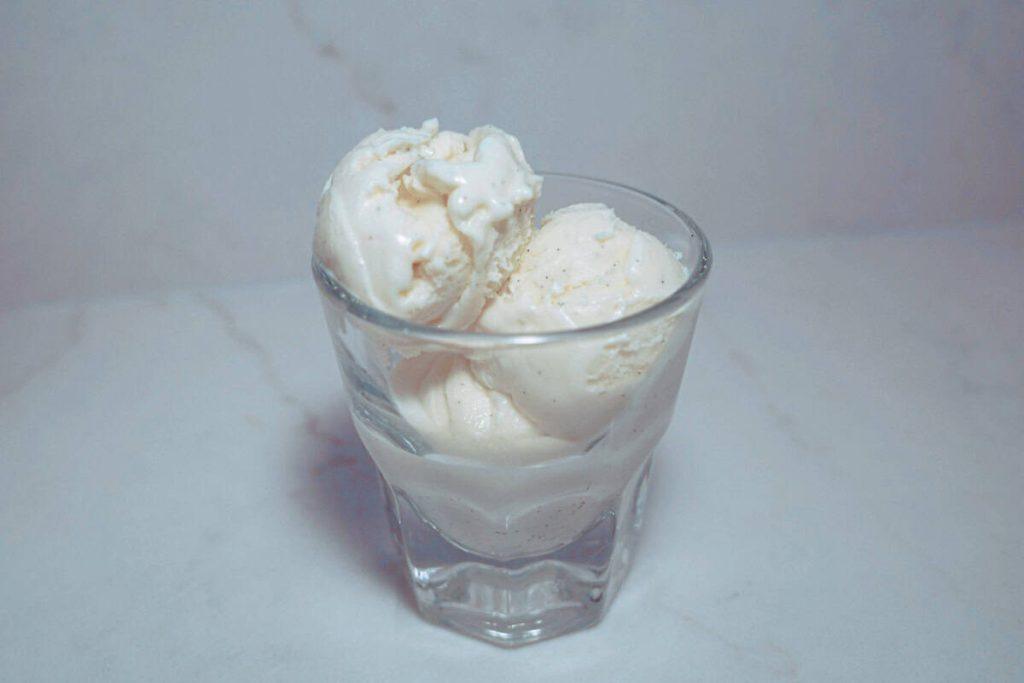
- Shape: A round disher shape gives you that classic, photogenic ball. Spade-style scoops are better for spreading but won’t give you a clean sphere.
- Material: Aluminum conducts heat well, which helps with hard ice cream. Stainless steel is more durable and dishwasher-safe but doesn’t have the same heat-transfer advantage.
- Size: Scoops are sized by number (the higher the number, the smaller the scoop) or by ounce. A #16 or #20 is a good standard serving size for ice cream.
What I Tried First
I’ll be honest, I didn’t buy an ice cream scoop until I started photographing my ice creams for this blog. I’m a simple gal, and I usually dig right into the container with a spoon. I have a #40 cookie scoop (also known as an ice cream disher) that I use for everything from cookies to meatballs, but I’ll be honest, it’s not great for ice cream. The spring-loaded release and the melon-baller shape just aren’t conducive to getting a clean scoop. I ended up with misshapen blobs that were not photo-ready.
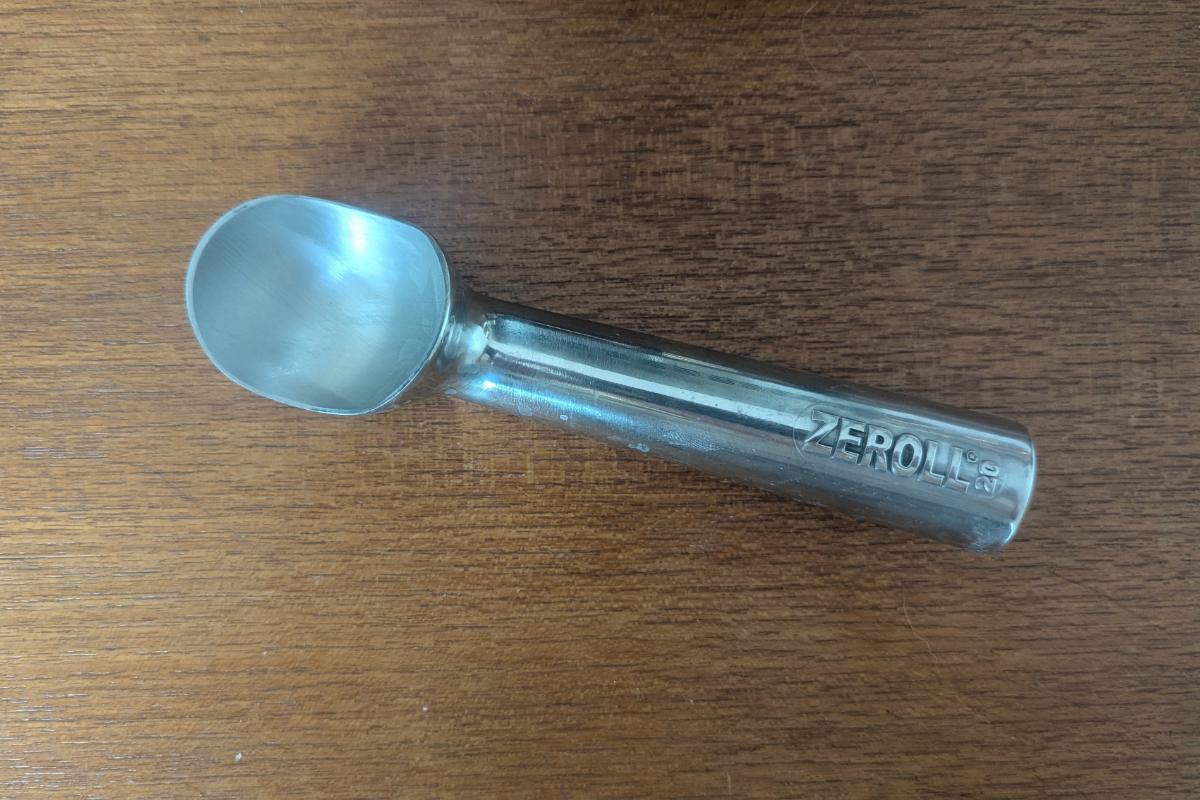
My Pick: Zeroll #20
I’m a big believer in buy-it-for-life products, so I splurged for a Zeroll #20 (a 2-ounce scoop) for home use. This is a professional ice cream scoop that’s been used in ice cream parlors since 1935–you really can’t argue with that track record. It has heat-conductive liquid in the handle that softens the ice cream as you scoop, and it’s a simple, unibody design with no breakable springs.
The only downside is that you absolutely cannot put it in the dishwasher. It’ll oxidize the aluminum and ruin the heat-conductive liquid inside, so hand-wash only. Worth it.
I like the 2-ounce size for small, uniform scoops–I usually go for 3-4 scoops for a serving. It also comes in a 4-ounce size (#10) if you prefer a single, larger scoop.
Grab all my favorites:
Staub Multi-Function Spatula
Gets into every rounded edge and packs pints perfectly.
Balci Reusable Pint Containers & Paper Pint Containers
The best reusable and disposable pint containers I found after 3 years of searching
Zeroll #20 Ice Cream Scoop
With heat-conducting liquid in the handle, this unibody scoop creates picture-perfect results.
Frequently Asked Questions
Ready to get churning? Try my Blood Orange Ice Cream and see how much of a difference the right tools make!